> ## Documentation Index
> Fetch the complete documentation index at: https://docs.ticketspotapp.com/llms.txt
> Use this file to discover all available pages before exploring further.
# Set up branded and white-label ticketing
> Apply brand identity, ticket and email designs, attendee pages, and custom domains across the booking journey.
Start with your brand identity, then configure each attendee-facing surface. Basic brand logo and shared colors are included on every plan. **Business+ and Platform** provide the advanced white-label and custom-domain capabilities in the [feature comparison](/account/feature-reference).
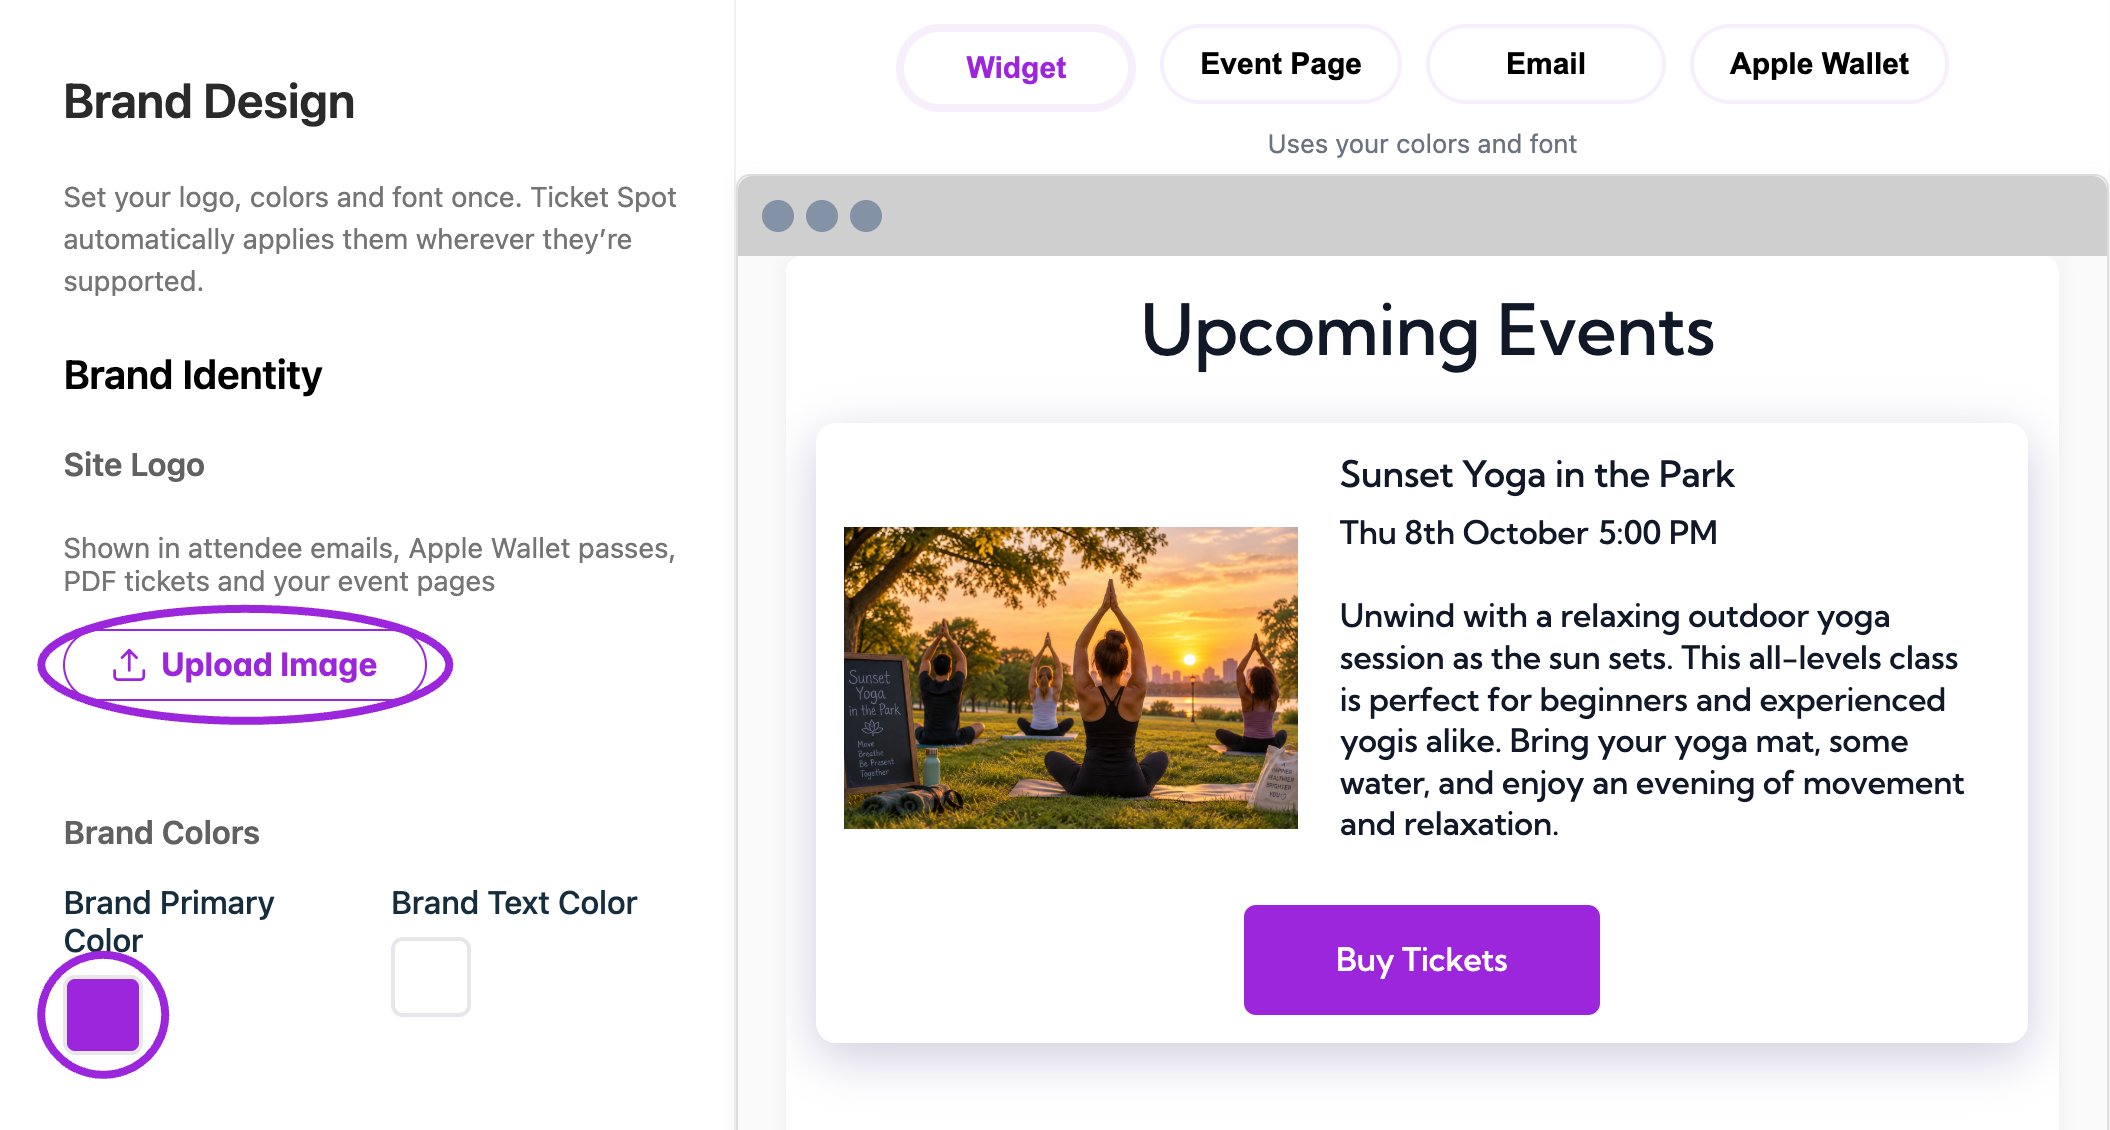 1. Open **Design → Brand** and set your logo and shared colors. Follow [Brand setup](/branding-and-design/brand-design).
2. Select **Your Brand** where available and review **Widget**, **Site**, and **Event Page** previews. Set any surface-specific images, text, and layouts.
3. In **Tickets & Passes**, check Ticket PDF, Receipt PDF, Membership PDF, wallet, and printer templates used by your events.
4. In **Attendee Communication**, review confirmations, reminders, approval messages, and other enabled templates.
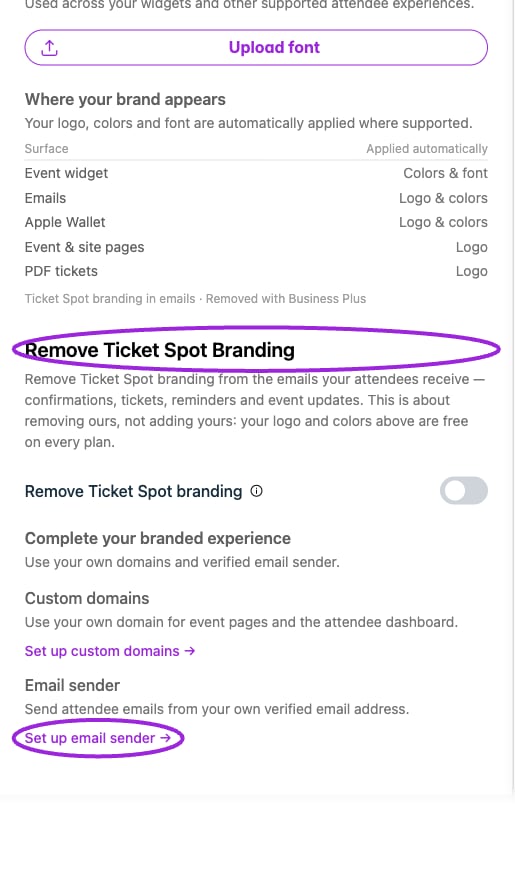
5. Set **Remove Ticket Spot Branding** where included. This Brand control affects the email footer's Ticket Spot content; separately inspect the other surfaces you use.
6. Configure **Attendee Ticket Page** sections and actions to fit your support and transfer policy.
7. Connect your [event and attendee dashboard domains and sender identity](/site-settings/domain-and-analytics).
8. Walk through a booking on the published website, then inspect the confirmation, attached ticket, wallet pass, and attendee portal on a phone.
Use the [Design options reference](/branding-and-design/design-options-reference) for individual controls. A website embed inherits its configured Ticket Spot design; the surrounding website theme and payment-provider checkout can have separate branding settings.
This documentation is built and hosted on [Mintlify](https://mintlify.com), a developer documentation platform.
1. Open **Design → Brand** and set your logo and shared colors. Follow [Brand setup](/branding-and-design/brand-design).
2. Select **Your Brand** where available and review **Widget**, **Site**, and **Event Page** previews. Set any surface-specific images, text, and layouts.
3. In **Tickets & Passes**, check Ticket PDF, Receipt PDF, Membership PDF, wallet, and printer templates used by your events.
4. In **Attendee Communication**, review confirmations, reminders, approval messages, and other enabled templates.
5. Set **Remove Ticket Spot Branding** where included. This Brand control affects the email footer's Ticket Spot content; separately inspect the other surfaces you use.
6. Configure **Attendee Ticket Page** sections and actions to fit your support and transfer policy.
7. Connect your [event and attendee dashboard domains and sender identity](/site-settings/domain-and-analytics).
8. Walk through a booking on the published website, then inspect the confirmation, attached ticket, wallet pass, and attendee portal on a phone.
Use the [Design options reference](/branding-and-design/design-options-reference) for individual controls. A website embed inherits its configured Ticket Spot design; the surrounding website theme and payment-provider checkout can have separate branding settings.
This documentation is built and hosted on [Mintlify](https://mintlify.com), a developer documentation platform.