> ## Documentation Index
> Fetch the complete documentation index at: https://docs.ticketspotapp.com/llms.txt
> Use this file to discover all available pages before exploring further.
# Sell event tickets on Ecwid with Ticket Spot
> Connect your Ecwid store, create an event, publish it as an Ecwid product, and verify the order and attendee in Ticket Spot.
Create your event and tickets in Ticket Spot, then publish the event as a product in your Ecwid store. Customers order through Ecwid checkout, and Ticket Spot creates the linked attendee records.
## Before you start
* Sign in to the Ecwid store where you want to install Ticket Spot, with permission to install apps and manage products.
* Have an event name, date, location, ticket prices, and capacity ready. Check [Ticket Spot plan requirements](/account/billing-and-plans) for the features you need.
* Set up the payment methods for your store in Ecwid before testing paid ticket purchases. Ecwid processes product orders through its store checkout.
This guide covers Ecwid product sales. If you are adding a standalone Ticket Spot widget to a different website, follow [Embed on your website](/plugins/embed-on-your-website), including its payment setup.
## Install and connect
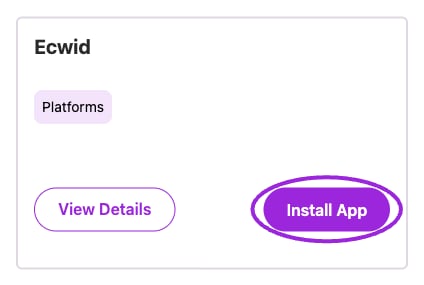
1. Open the [Ticket Spot listing in the Ecwid App Market](https://www.ecwid.com/apps/featured/ticket-spot). You can also open Ticket Spot **Integrations → Platform Integrations** and choose **Install App** on **Ecwid**.
2. Complete installation for the intended store and follow the sign-in instructions. If Ticket Spot asks you to sign in to finish linking the installation, complete that step.
3. In Ticket Spot, use the site selector to confirm you are working in the workspace for that Ecwid store.
 ## Create your first event
In the connected workspace, create the event and add its dates, venue, ticket types, prices, and quantities. Follow [Create your first event](/getting-started/first-event), or choose an [event-type guide](/event-types/overview) for a class, tour, show, or other format.
Start with the event and ticket choices you intend to offer. Review any registration questions and confirm how they appear on the Ecwid product during your test purchase.
Exclusive time slots use Ticket Spot checkout and cannot be published to an external store catalog. Use the [exclusive booking guide](/bookings/exclusive-time-slots) for that workflow.
## Publish to your Ecwid store
1. Open the event in Ticket Spot and choose **Publish**. If separate destination buttons appear, choose **Publish to Ecwid**.
2. In **Publish to Ecwid Store**, review the **Categories** choices for your store.
3. Choose **Publish to Ecwid** to create or update the store product. **Save** keeps your event changes without publishing them to Ecwid.
4. Open **Ecwid · Product linked**, then choose **Open in Ecwid** to inspect the linked product.
5. Check its store visibility, category placement, dates, ticket options, prices, and available quantities. Open the public storefront to confirm a visitor can find it.
Make later event and ticket changes in Ticket Spot and publish to Ecwid again when you want to update the linked product.
## Test the purchase and attendee record
Open the published product as a visitor and check both desktop and mobile. Select the intended event date and ticket option, enter the required information, and complete an order through Ecwid checkout.
Verify the result in both places:
* **Ecwid:** confirm the product, selected options, quantity, order total, and payment status.
* **Ticket Spot:** open the event's attendee dashboard and find the order and attendees. Check that the date and ticket type match the purchase and review ticket communication.
An attendee record is not a substitute for checking the order's payment status in Ecwid. Complete the [launch checklist](/getting-started/launch-checklist) before promoting your event.
## Troubleshooting
| What you see | What to check |
| - | - |
| Ecwid publishing is missing | Confirm that the selected Ticket Spot workspace belongs to the connected Ecwid store. |
| Event changes are missing in the store | Use **Publish to Ecwid** after editing; **Save** alone does not publish the product update. |
| The product is hard to find | Check its visibility and category placement in Ecwid, then visit the published storefront. |
| An Ecwid order has no Ticket Spot attendee | Confirm the purchase used the product linked from the Ticket Spot event and the intended ticket option. Keep the Ecwid order number and event details when contacting support. |
| A ticket email is missing | Check [email and SMS delivery](/attendee-management/email-and-sms-delivery) for the attendee. |
## Next steps
* [Manage attendees and orders](/attendee-management/managing-attendees).
* [Customize attendee communications](/branding-and-design/attendee-communication-design).
* [Prepare event check-in](/mobile-app/mobile-app-overview).
* [Explore more features](/guides/overview).
This documentation is built and hosted on [Mintlify](https://mintlify.com), a developer documentation platform.
## Create your first event
In the connected workspace, create the event and add its dates, venue, ticket types, prices, and quantities. Follow [Create your first event](/getting-started/first-event), or choose an [event-type guide](/event-types/overview) for a class, tour, show, or other format.
Start with the event and ticket choices you intend to offer. Review any registration questions and confirm how they appear on the Ecwid product during your test purchase.
Exclusive time slots use Ticket Spot checkout and cannot be published to an external store catalog. Use the [exclusive booking guide](/bookings/exclusive-time-slots) for that workflow.
## Publish to your Ecwid store
1. Open the event in Ticket Spot and choose **Publish**. If separate destination buttons appear, choose **Publish to Ecwid**.
2. In **Publish to Ecwid Store**, review the **Categories** choices for your store.
3. Choose **Publish to Ecwid** to create or update the store product. **Save** keeps your event changes without publishing them to Ecwid.
4. Open **Ecwid · Product linked**, then choose **Open in Ecwid** to inspect the linked product.
5. Check its store visibility, category placement, dates, ticket options, prices, and available quantities. Open the public storefront to confirm a visitor can find it.
Make later event and ticket changes in Ticket Spot and publish to Ecwid again when you want to update the linked product.
## Test the purchase and attendee record
Open the published product as a visitor and check both desktop and mobile. Select the intended event date and ticket option, enter the required information, and complete an order through Ecwid checkout.
Verify the result in both places:
* **Ecwid:** confirm the product, selected options, quantity, order total, and payment status.
* **Ticket Spot:** open the event's attendee dashboard and find the order and attendees. Check that the date and ticket type match the purchase and review ticket communication.
An attendee record is not a substitute for checking the order's payment status in Ecwid. Complete the [launch checklist](/getting-started/launch-checklist) before promoting your event.
## Troubleshooting
| What you see | What to check |
| - | - |
| Ecwid publishing is missing | Confirm that the selected Ticket Spot workspace belongs to the connected Ecwid store. |
| Event changes are missing in the store | Use **Publish to Ecwid** after editing; **Save** alone does not publish the product update. |
| The product is hard to find | Check its visibility and category placement in Ecwid, then visit the published storefront. |
| An Ecwid order has no Ticket Spot attendee | Confirm the purchase used the product linked from the Ticket Spot event and the intended ticket option. Keep the Ecwid order number and event details when contacting support. |
| A ticket email is missing | Check [email and SMS delivery](/attendee-management/email-and-sms-delivery) for the attendee. |
## Next steps
* [Manage attendees and orders](/attendee-management/managing-attendees).
* [Customize attendee communications](/branding-and-design/attendee-communication-design).
* [Prepare event check-in](/mobile-app/mobile-app-overview).
* [Explore more features](/guides/overview).
This documentation is built and hosted on [Mintlify](https://mintlify.com), a developer documentation platform.