
Selling event tickets on Shopify involves both the event’s booking rules and the Shopify product page. Use the Ticket Selector setup guide for the full walkthrough.

How do I add time slots to a Shopify product?

Create the event’s sessions under Dates & Times → Time Based in Ticket Spot, configure tickets and capacity, then publish/update its Shopify product. Add the Ticket Selector app block to the product’s theme template and select that template under Shopify · Product linked → Product Template. Customers choose a date, time, and ticket through the selector before paying with Shopify. Use Recurring instead for a repeating schedule such as a weekly class. See Shopify time-slot setup.

Can customers choose a date from a calendar on Shopify?

Yes. Set up your event dates and choose a calendar presentation in Design → Widget. The Ticket Selector displays that booking flow on the linked product page. The Event Widget app block serves a different purpose: it lists events on a Shopify page. Use Ticket Selector when the customer is already on an event product and needs to choose a date or time.

Can I sell tickets with a seating chart on Shopify?

Yes. Create and publish the seating chart in Ticket Spot, assign it to the event, and map its categories to ticket types. Install Ticket Selector on the product’s assigned template so customers can choose seats. Shopify’s standard variant dropdown does not provide Ticket Spot seat selection. Customers choose their seats before Shopify checkout. Check availability, price options, and the enlarged map on mobile. See Shopify seating setup.
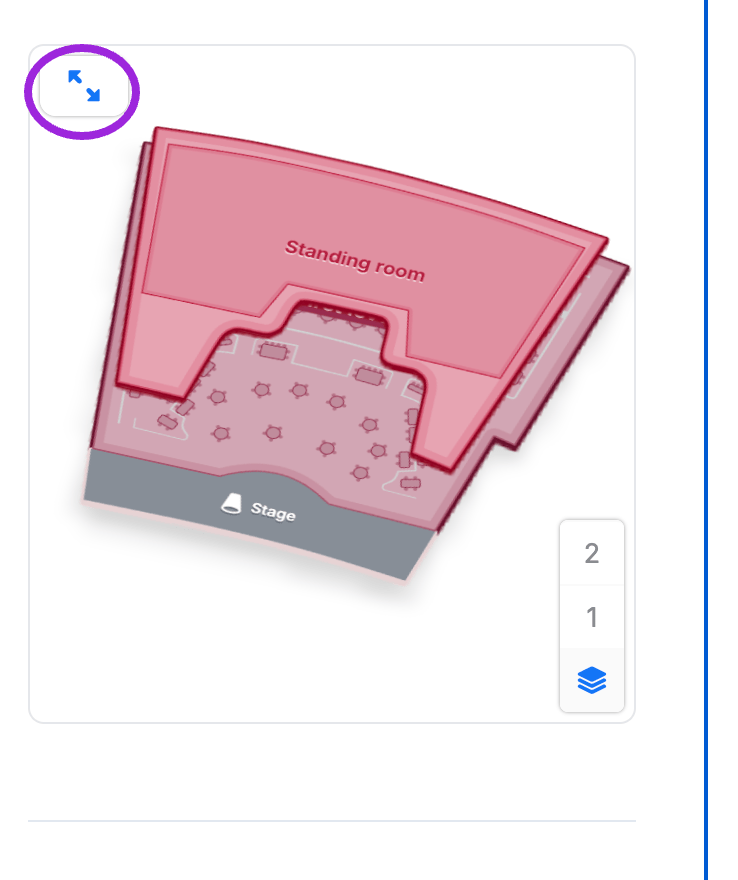
Shopify Ticket Selector seating chart with the enlarge-map control highlighted

Ticket Selector displays the seating chart on the Shopify product page.

Can ticket variants share one inventory limit?

Use Ticket Spot’s Event Capacity for a shared attendee limit, alongside individual ticket quantities. For example, Adult and Child tickets can share a room capacity of 30. Apply the right limit to each date or time slot when the event has separate occurrences. Shopify tracks stock per variant; setting both variants to 30 does not create a combined limit of 30. Use the Ticket Selector booking flow and keep the event and linked product synchronized. See shared inventory across ticket variants.

Which product template should I select in Ticket Spot?

Choose the template that contains the Ticket Selector app block. Its name is up to you; Ticket spot is an example, not a required name. Create and save it in Shopify, then select it under Shopify · Product linked → Use Ticket Spot Selector → Product Template and click Save Settings. Ticket Spot lists templates from the published theme. If yours is missing, confirm it exists there and reload the event. Choosing a product in the theme editor’s preview does not assign the template. See template assignment.

Why is the Ticket Selector missing or the normal buy button still showing?

Check that the product is linked to the correct Ticket Spot event, its assigned template contains the saved Ticket Selector block, and the template belongs to the storefront’s published theme. Then confirm Use Ticket Spot Selector is enabled and saved in Ticket Spot. Review native variant, quantity, and buy-button blocks on that event template. Remove competing purchase paths that bypass the selector’s required date, seat, or access-code selection. If you changed themes, add the app block to the new theme too.

Can I restrict Shopify event tickets with an access code?

Yes. Set the event or hidden-ticket access rule in Ticket Spot and use the selector on Shopify. For hidden tickets, turn on Show access code field in Design → Widget → All Settings → Checkout. An access code unlocks access; a promo code changes price. Test a valid and invalid code before sharing the product. See access-code setup. Create a link under the event’s Tracking Links, choose Use Shopify Product URL, and share the generated Tracking URL. Keep the full URL intact so its Ticket Spot tracking information reaches the selector. Review views, tickets, and sales under Tracking Links. Sharing the plain product URL does not identify the campaign. See tracking links to Shopify products.

Can customers skip the Shopify cart page?

Enable Direct Checkout in the linked-product panel and save. Customers still complete ticket selection and any required attendee form, then continue to Shopify checkout. This setting skips the cart page, not payment.

Can I use the buyer’s Shopify details instead of asking for every guest?

Enable Skip Attendee Details Form to use the Shopify purchaser’s contact information. Leave it off when you need each guest’s name, event-question answers, or waivers. Waitlist signup still collects contact details. For individual guest information, leave the skip option off and enable Collect attendee details for each ticket in widget Checkout settings. See linked-product options.

Does the Ticket Selector also display tickets after payment?

The selector handles booking before payment. Add Ticket Spot – Ticket Access separately to Shopify’s Thank You page for post-purchase ticket access. Follow Thank You page setup.