
Publish your membership
- In Ticket Spot, select the site connected to your Shopify store.
- Open Memberships and create a membership, or edit an existing one.
- Set its name, description, price, duration, available quantity, and any sales dates. Use the same currency as your Shopify store and set the membership to Active.
- Save the membership, then choose Publish to Shopify in its Shopify column. Review the membership name in the confirmation dialog, then confirm.
- Keep the dialog open while the publishing spinner runs. When it finishes, the status changes to Published. View product opens the customer-facing storefront page; Shopify admin opens the product editor for your store.
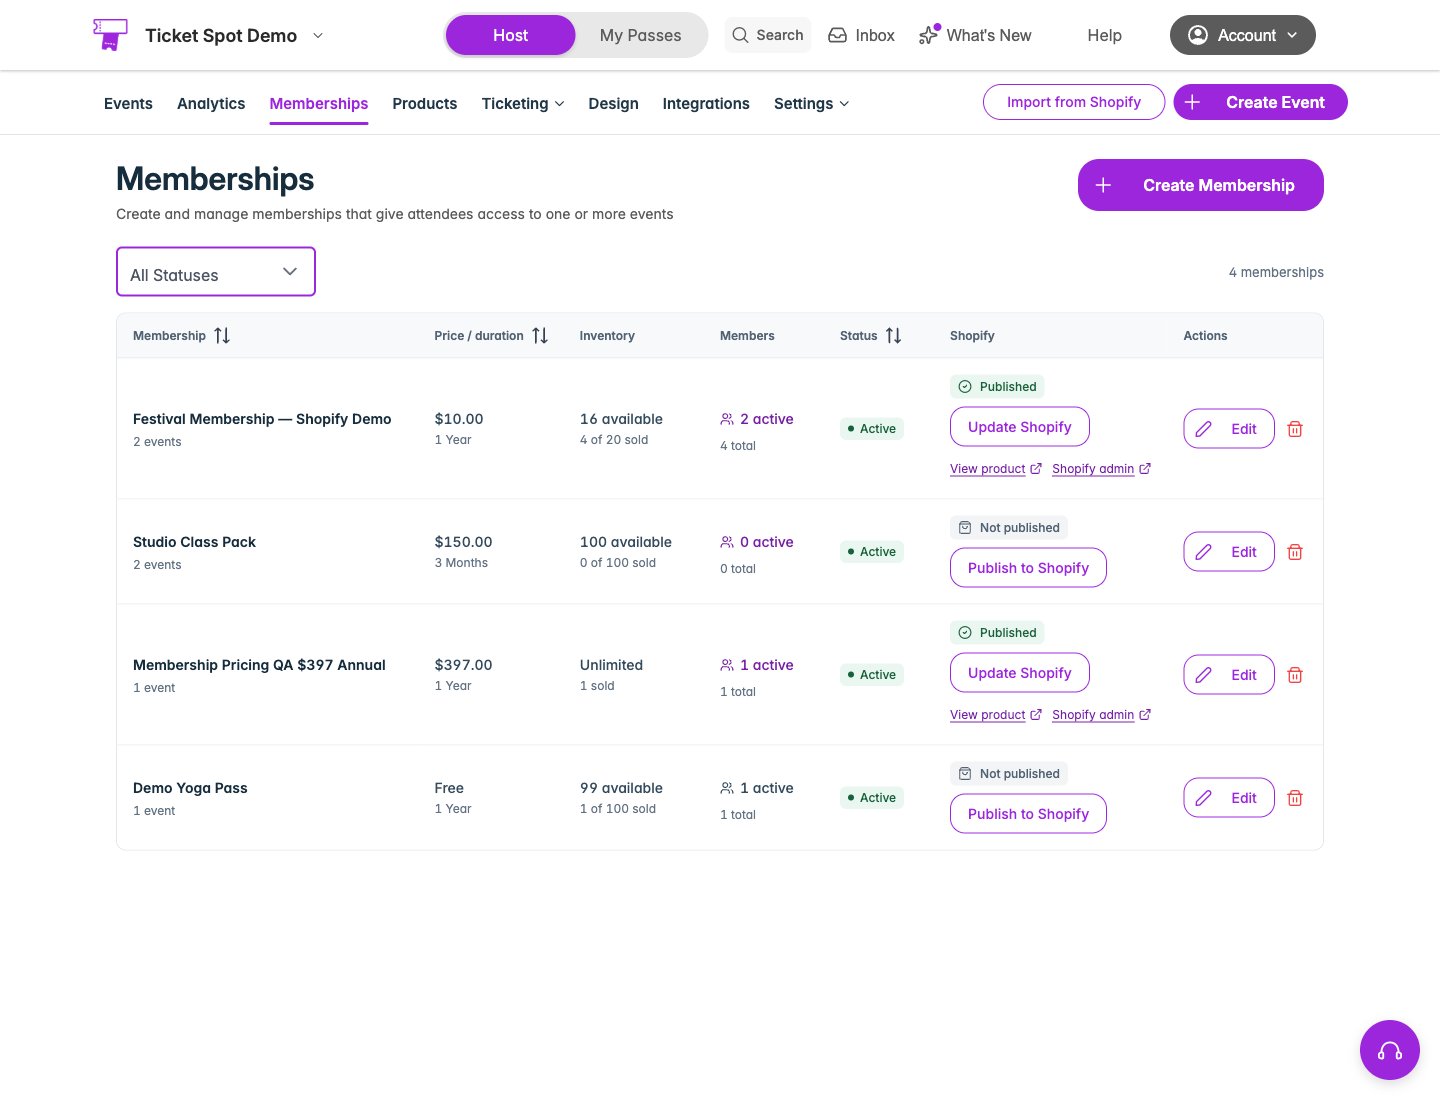
Publish each membership once. Update Shopify keeps the same product when you publish changes.
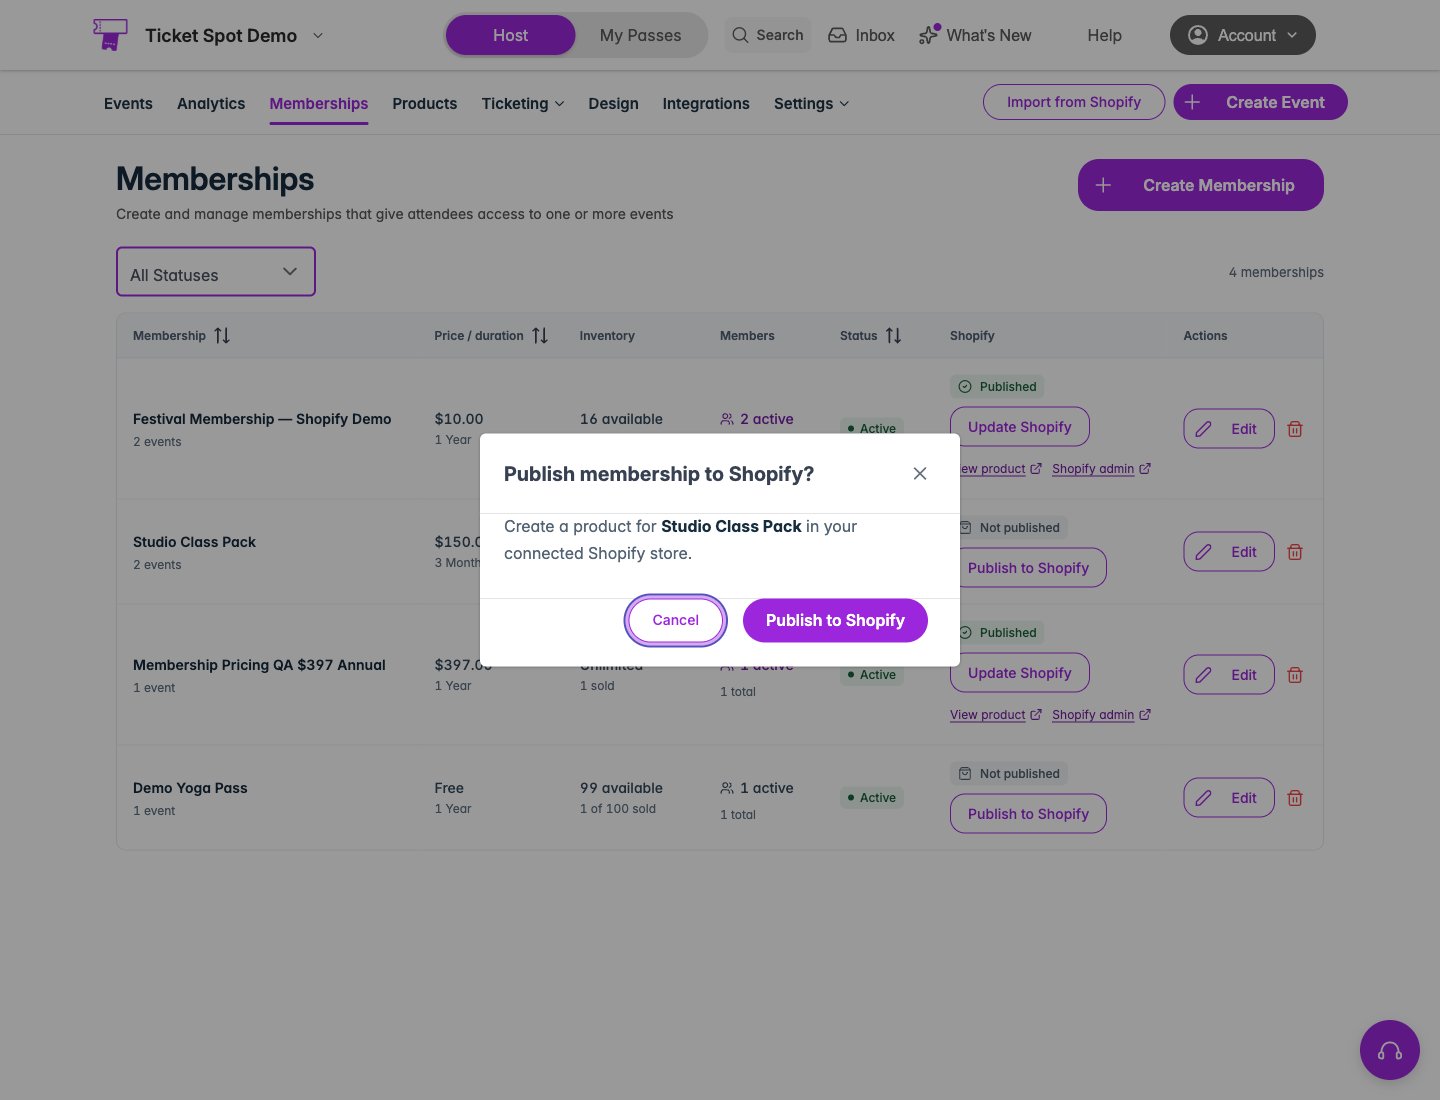
Check the membership name before publishing. The dialog shows progress until Shopify finishes.
Offer the membership at an event
- Open a saved ticket event and select Memberships.
- Choose Add Membership, select your membership, and enable Available during checkout.
- Choose whether the membership Grants access to this event, then add it.
- Check that its card shows Published to Shopify. You can also publish or update the membership directly from this card; review and confirm the action in its dialog.
- Publish the event and its admission tickets to Shopify.
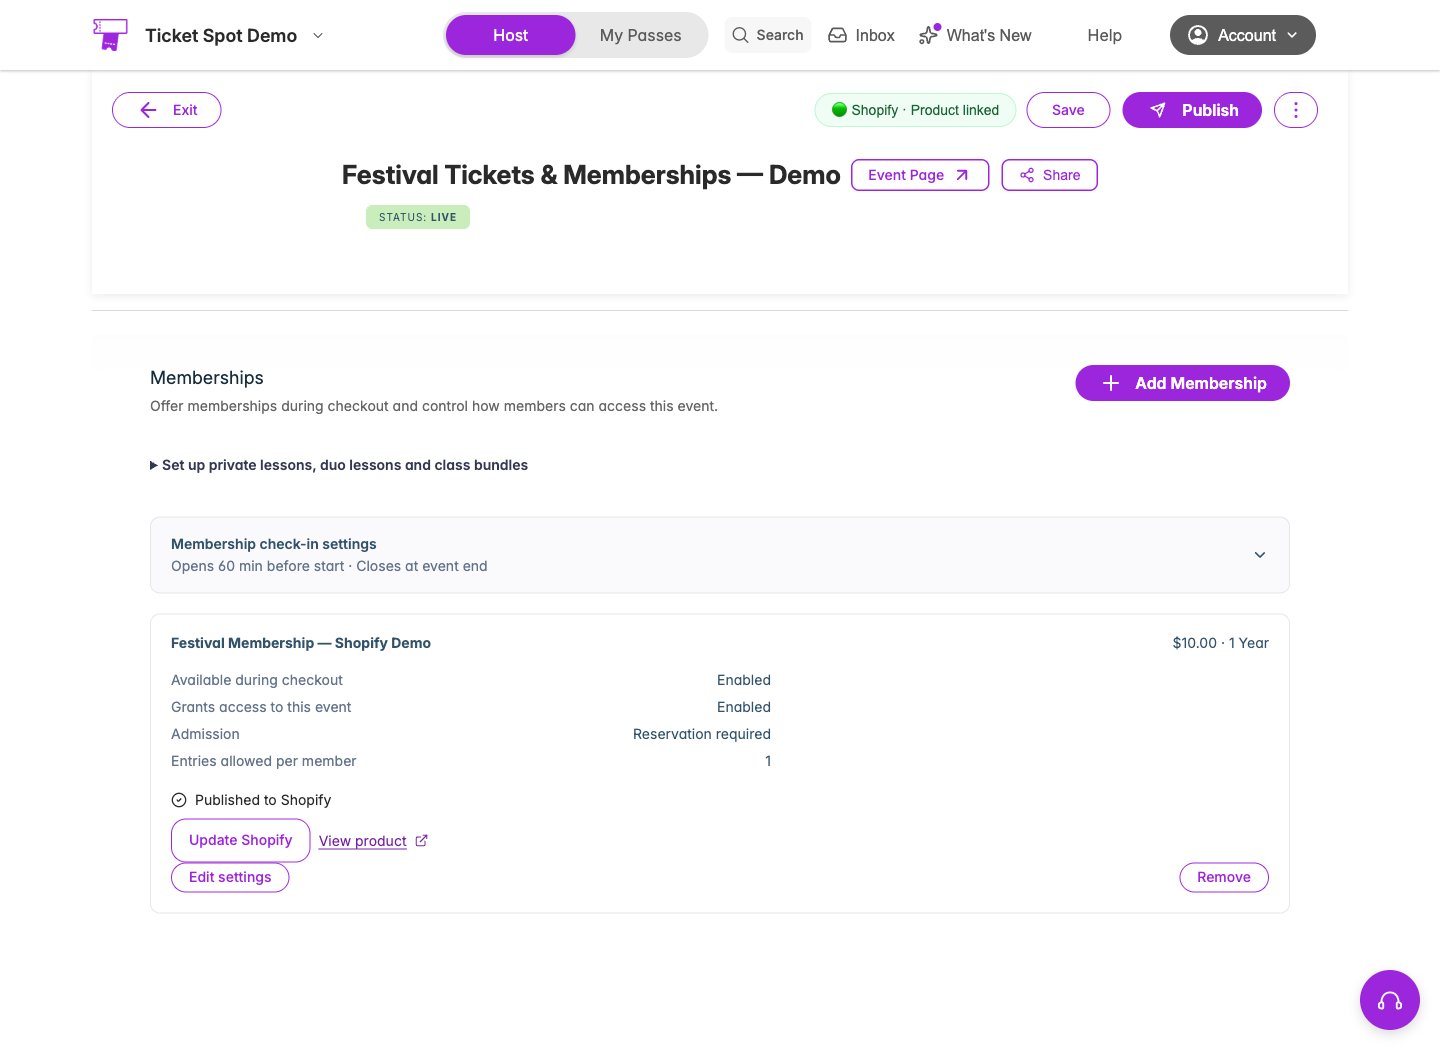
Checkout availability and event access are separate settings. The event card also shows whether the membership is ready for Shopify.
Check the customer checkout
Use the Ticket Selector app block on your event product page. Customers must start with the Ticket Spot selector so their membership choice and attendee details stay with the booking.- Select the event’s admission tickets.
- In Select Memberships, choose Add Membership for the pass you want. This step’s navigation label follows your checkout text settings.
- Review the ticket and membership amounts in the order summary. Customers can remove the membership before continuing.
- Complete any event add-on or merchandise selections, then enter attendee details.
- Choose Continue to Shopify checkout. Check that Shopify lists both the ticket and membership, then complete payment.
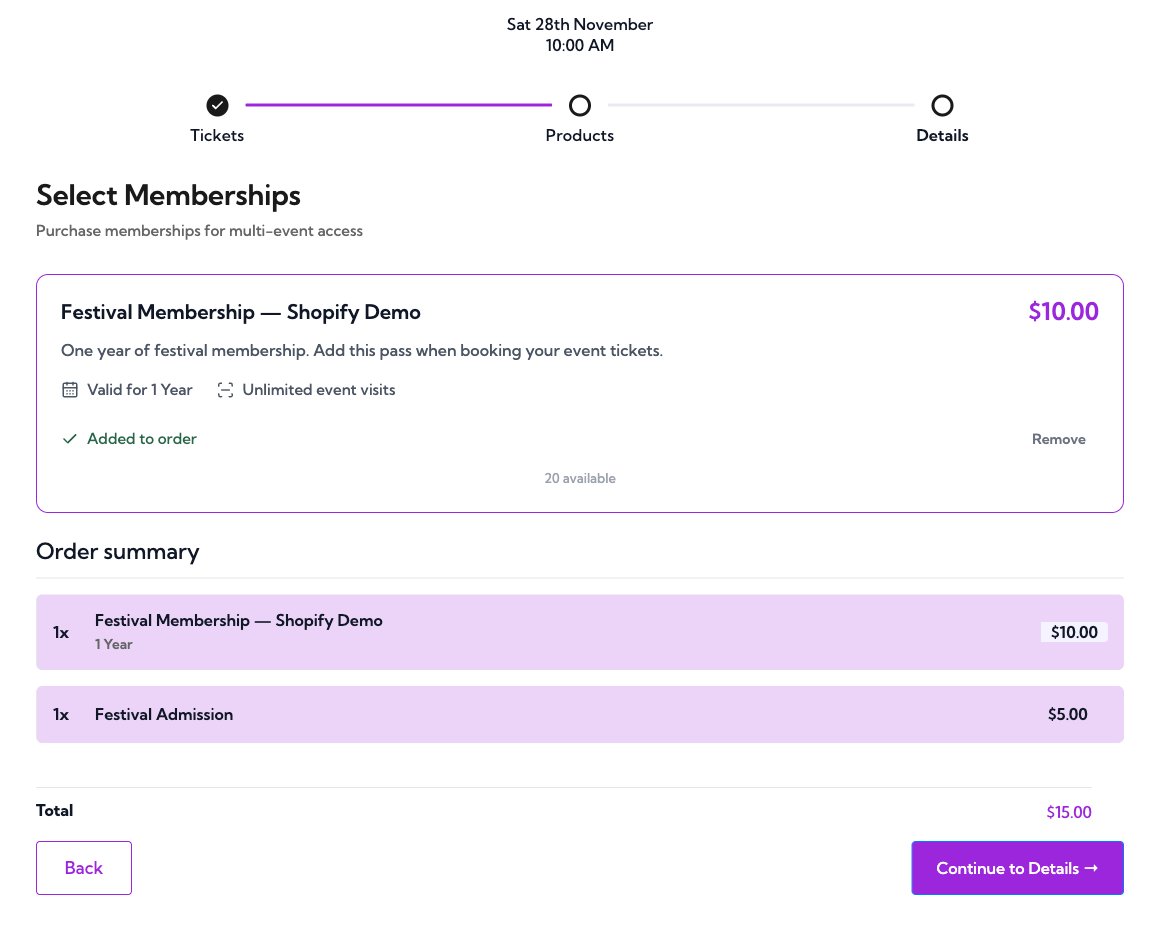
The order summary combines admission and the selected membership before the customer continues to Shopify.
Sell the membership as a regular Shopify product
- Publish the membership and check that its Shopify product is available on the Online Store sales channel.
- Add the product to your store’s navigation or a collection, or share its storefront product URL.
- Customers choose a quantity, select Add to cart, and complete normal Shopify checkout with their email and billing details.
- After payment, open Memberships → View Members to find the issued holders. Each purchased unit receives its own membership reference, using the purchaser’s details from Shopify.
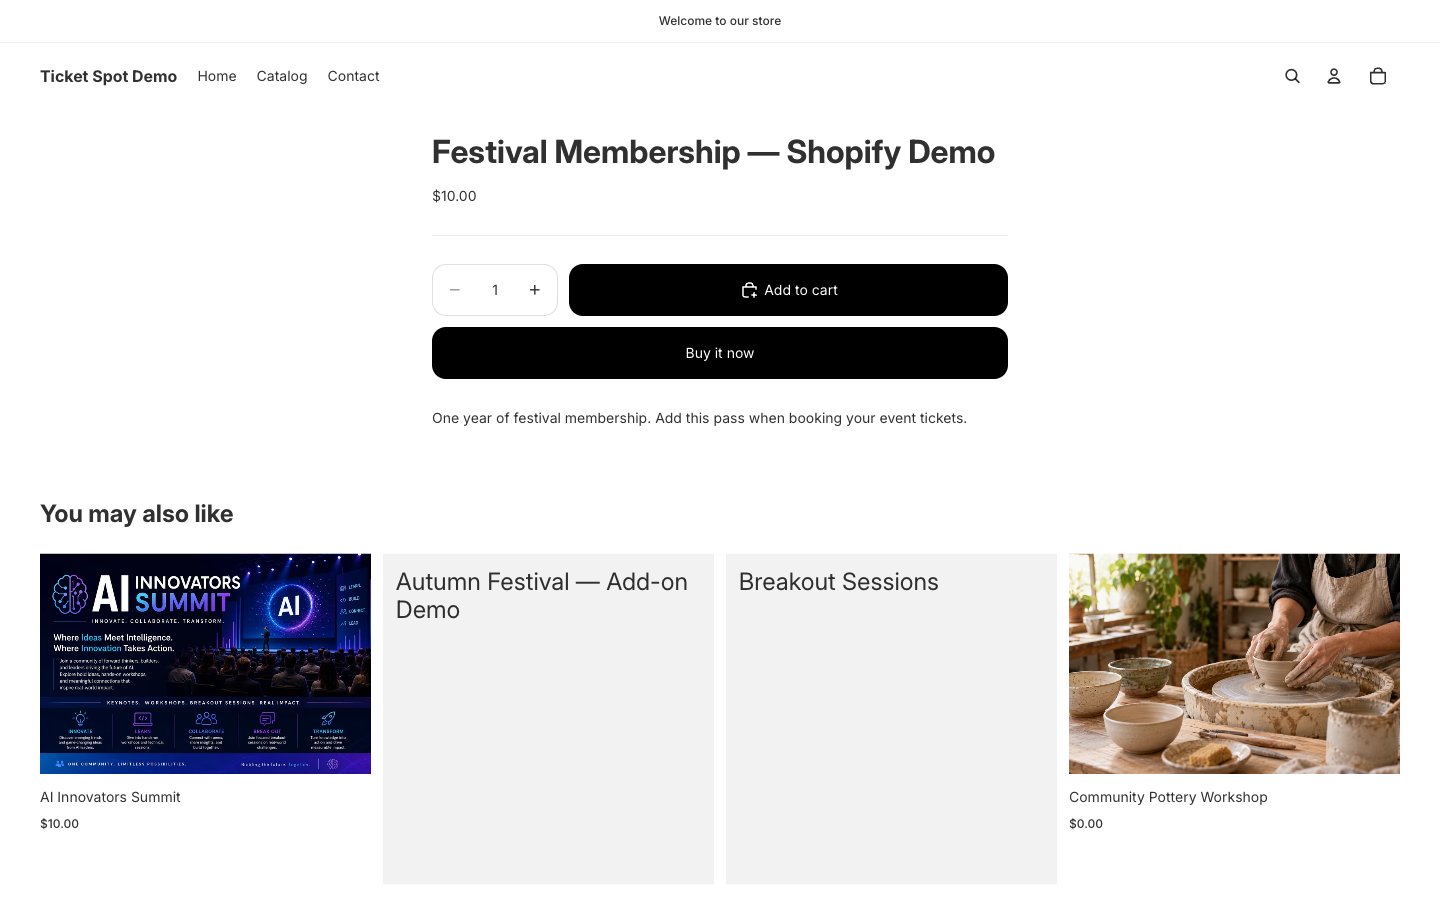
The published membership can use your theme's standard Add to cart and Buy it now controls.
Sell a membership without an admission ticket
- Create a membership sales event, choosing Sell memberships under Event Setup.
- In its Memberships tab, add the published membership and enable Available during checkout. You can use the same membership already offered with ticket events.
- Publish this sales event to Shopify, then add the Ticket Selector app block to its Shopify product template.
- Open the sales event’s Shopify product page. Customers choose Memberships → Your details → Continue to Shopify checkout. No admission ticket is required.
- Check that Shopify lists only the selected memberships before paying. After payment, find the new holder in Memberships → View Members.
Find the purchased membership
Open Memberships, then select the membership’s holder count to view its members. A purchased holder has a member number, QR code, activation date, and expiration date. Membership validity begins when the purchase is processed. The ticket and membership belong to the same Ticket Spot order. Existing membership confirmation, pass downloads, and member access settings apply to the purchased holder. See Manage membership holders. For a refund in Shopify, select the membership line and quantity if you intend to revoke that membership. Refunding only a ticket leaves the membership active. An amount-only refund does not identify a membership to cancel automatically; review the holder separately when needed.Troubleshooting
For optional workshops or other ticketed activities, use event add-ons.