
Installation Guide
About This Integration
The Ticket Spot and Klaviyo integration automatically syncs attendee and order data from your ticket sales directly into your Klaviyo account. Every time a customer purchases tickets through Ticket Spot, their order details, attendee information, and event data are sent to Klaviyo as custom events. This integration works seamlessly across multiple platforms including Shopify, Wix, and Ticket Spot’s own widget, ensuring consistent data flow regardless of where your customers purchase tickets.Prerequisites
Before installing the integration, you will need:- An active Ticket Spot account with access to the Integrations page
- A valid Klaviyo account
- Permission to authorize OAuth connections in both platforms
Installation Steps
Step 1: Log in to your Ticket Spot account at ticketspotapp.com/manage and click on the Integrations tab in the top navigation bar. Step 2: Scroll to find the Klaviyo integration card under the Marketing Automation category and click the Connect button.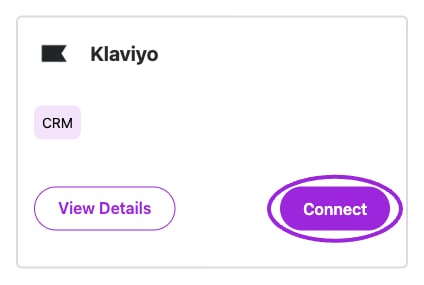
Open Integrations and choose Connect on the Klaviyo card. External authorization is a separate step.
Verifying Your Installation
To confirm the integration is working:- Create a test event in Ticket Spot and make it live
- Go to the Event Page or Widget Customization to preview your event
- Complete a test ticket purchase
- Check your Klaviyo account for the new custom event containing the order and attendee data
Managing Your Connection
View Details: Read what the integration supports. Check the connected-account label on the card to confirm the linked account. Disconnect: To remove the integration, click the three-dot menu icon and select Disconnect. Ticket Spot will immediately stop sending data to Klaviyo.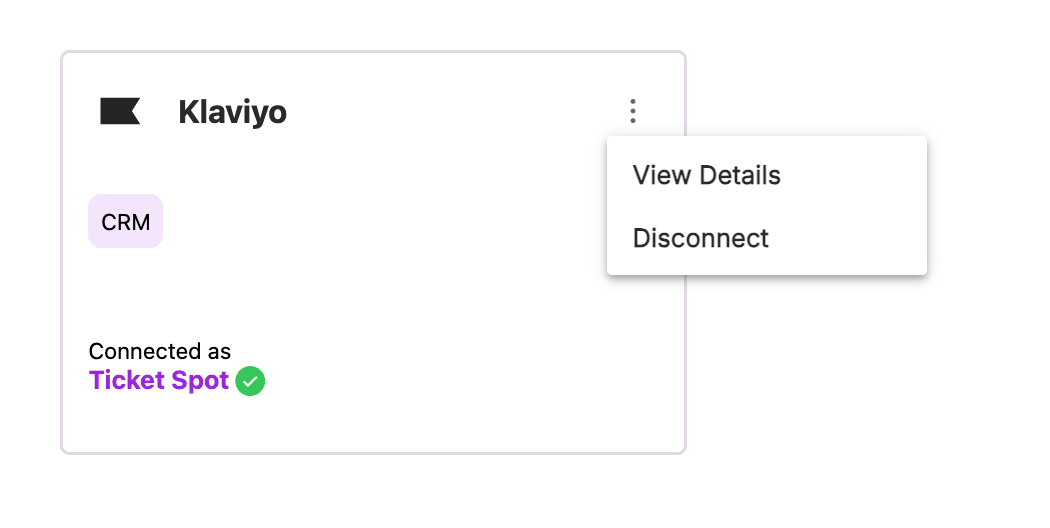
Support
If you need assistance with the Klaviyo integration, contact Ticket Spot support at support@ticketspotapp.com or visit our help center at ticketspotapp.com/support.Data Reference
Overview
The Ticket Spot integration sends data to Klaviyo only. When a customer completes a ticket purchase, Ticket Spot sends three types of custom events to Klaviyo, providing comprehensive data for marketing automation, segmentation, and personalization.Event 1: Placed Order
Sent once per order to capture the complete transaction. This event is associated with the purchaser’s profile.Profile Data
email- Purchaser’s email addressfirst_name- Purchaser’s first namelast_name- Purchaser’s last namephone_number- Purchaser’s phone number (optional)
Event Properties
Items Array Structure
Each item in theItems array contains:
ProductID- Ticket UUIDProductName- Ticket type name (e.g., “VIP”, “General Admission”)Quantity- Always 1 (each attendee is a separate item)ItemPrice- Base ticket priceRowTotal- Final ticket price after discountsFeeAmount- Service fees for this ticket
Event 2: Ordered Experience
Sent once per ticket/attendee to track individual ticket purchases. This event is associated with the purchaser’s profile (not the individual attendee).Profile Data
email- Purchaser’s email addressfirst_name- Purchaser’s first namelast_name- Purchaser’s last name
Event Properties
Event 3: Registered Attendee
Sent once per unique attendee email (excluding the purchaser) to create profiles for all attendees. This allows you to market directly to attendees who didn’t make the purchase.Profile Data
email- Attendee’s email addressfirst_name- Attendee’s first namelast_name- Attendee’s last namephone_number- Attendee’s phone number (optional)
Event Properties
Using This Data in Klaviyo
These events and properties enable powerful marketing capabilities:- Segmentation: Build audience segments based on event attendance, ticket types, or order values
- Flow Triggers: Initiate automated email sequences based on “Placed Order”, “Ordered Experience”, or “Registered Attendee” events
- Personalization: Reference event details, attendee names, and order information in email content using Klaviyo’s template variables
- Reporting: Track ticket sales performance, revenue, and customer behavior over time
- Multi-Attendee Marketing: Reach both purchasers and individual attendees with targeted messaging
Use Case How-To
Use Case 1: Send Event Reminder Emails
Automatically remind ticket purchasers about their upcoming event using Klaviyo flows. Step 1: In your Klaviyo account, navigate to Flows and click Create Flow. Step 2: Select Create from Scratch and name your flow “Event Reminder.” Step 3: Set the trigger to Metric and select the custom event Placed Order (sent by Ticket Spot). Step 4: Add a Time Delay action. Set it to wait until a specific time before the event. For example, set it to trigger 24 hours before theEventStartAt property.
Step 5: Add an Email action. Create your reminder email using dynamic properties:
- Use
{{ event|lookup:'EventName' }}to display the event name - Use
{{ event|lookup:'EventStartAt' }}to show the event date and time - Use
{{ event|lookup:'VenueName' }}to include the venue or location - Use
{{ event|lookup:'AttendeeCount' }}to reference the number of tickets purchased
Use Case 2: Segment Attendees by Event
Create a segment of customers who purchased tickets to specific events for targeted campaigns. Step 1: In Klaviyo, go to Lists & Segments and click Create List / Segment. Step 2: Choose Segment and name it (e.g., “Summer Festival Attendees”). Step 3: Click Add Condition and select What someone has done (or not done). Step 4: Choose the custom event Placed Order and set the condition to at least once. Step 5: Click Add Property Filter and selectEventName. Set it to equals and enter your specific event name (e.g., “Summer Music Festival 2026”).
Step 6: Optionally, add a date range filter to only include recent purchases.
Step 7: Click Create Segment. This segment will automatically update as new ticket purchases occur.
Use Case 3: Personalize Order Confirmation Emails
Enhance your order confirmation emails with dynamic event and order information. Step 1: In Klaviyo, navigate to Flows and create a new flow or edit an existing order confirmation flow. Step 2: Set the trigger to the Placed Order custom event. Step 3: Add an Email action immediately after the trigger (no delay). Step 4: In the email editor, use Klaviyo’s template variables to personalize content:- Order Details:
{{ event|lookup:'OrderId' }},{{ event|lookup:'$value' }},{{ event|lookup:'AttendeeCount' }} - Event Details:
{{ event|lookup:'EventName' }},{{ event|lookup:'EventStartAt' }},{{ event|lookup:'VenueName' }} - Items Purchased: Loop through
{{ event|lookup:'Items' }}to display each ticket type
Use Case 4: Target VIP Ticket Purchasers
Create a segment of customers who purchased VIP or premium tickets for exclusive communications. Step 1: In Klaviyo, go to Lists & Segments and click Create List / Segment. Step 2: Choose Segment and name it “VIP Ticket Holders.” Step 3: Click Add Condition and select What someone has done (or not done). Step 4: Choose the custom event Ordered Experience and set the condition to at least once. Step 5: Click Add Property Filter and selectExperienceName. Set it to contains “VIP” (or your specific VIP ticket name).
Step 6: Click Create Segment to save. Use this segment for exclusive offers, early access, or premium communications.
Use Case 5: Welcome Email for Non-Purchaser Attendees
Send a welcome email to attendees whose tickets were purchased by someone else. Step 1: In Klaviyo, navigate to Flows and click Create Flow. Step 2: Select Create from Scratch and name your flow “Attendee Welcome.” Step 3: Set the trigger to Metric and select the custom event Registered Attendee. Step 4: Add an Email action immediately after the trigger. Step 5: Create a welcome email explaining they’ve been registered for an event:- Use
{{ event|lookup:'EventName' }}to display the event name - Use
{{ event|lookup:'EventStartAt' }}for the date - Use
{{ event|lookup:'VenueName' }}for the location - Include event details and what to expect
Additional Use Cases
- Post-Event Survey: Create a flow triggered by Placed Order with a time delay set to trigger 1 day after
EventStartAtto gather feedback - High-Value Customer Segment: Filter Placed Order events where
$valueis greater than a specific amount to identify big spenders - Repeat Attendee Campaigns: Build segments of customers who have triggered Placed Order at least 2 times to reward loyal customers
- Abandoned Cart Recovery: Track incomplete purchases and follow up with potential customers