
Reference floor plans and buyer-visible backgrounds
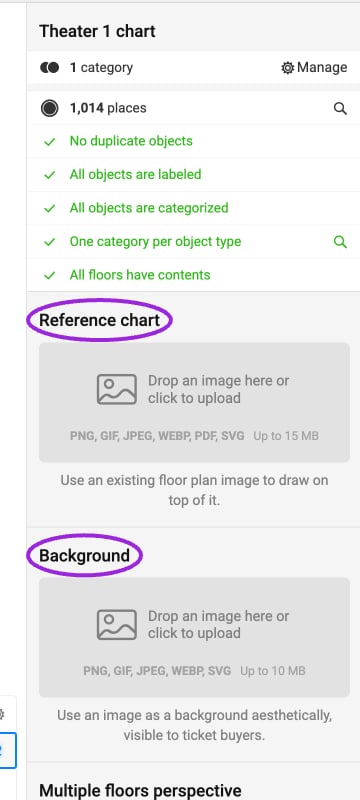
A Reference chart is a guide for drawing the venue. A Background image is decorative and visible to buyers; neither upload creates seats.
Floors and sections
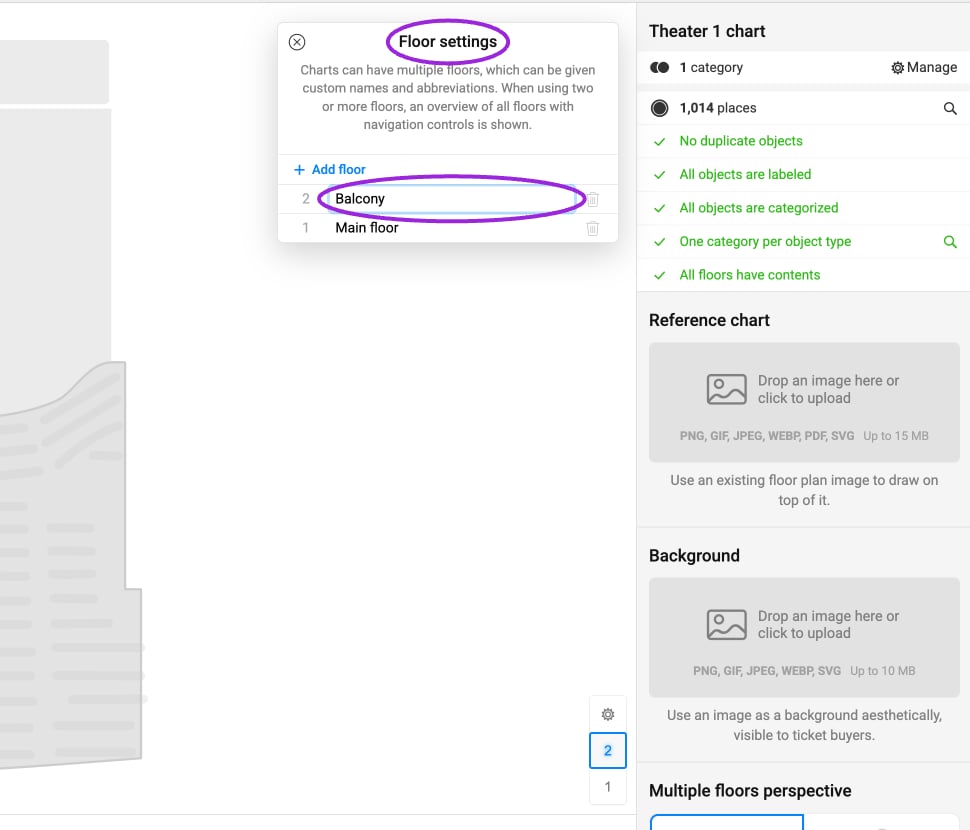
Floor settings gives each level a clear name and abbreviation. Multiple floors add navigation controls to the buyer’s seating map.
Sell individual chairs or an entire table
Select a table in the designer. Its properties include Category, Chairs, Open spaces, radius or dimensions, rotation, and Table labeling. Set the category that you will map to a ticket, and give every bookable table a unique label. Displayed label changes what visitors see; keep the underlying label suitable for identifying the booking.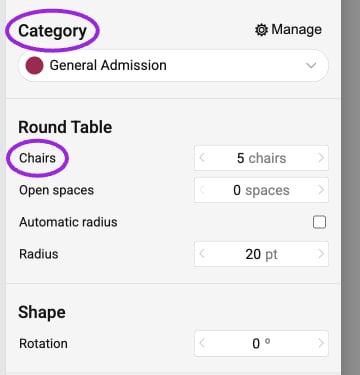
The selected table has a category and five chairs. Layout properties do not determine whether the table or individual chairs are sold.
- Book by seat to let customers select individual chairs.
- Book by table to let a customer select and book the entire table with one click. The table is the bookable object, so do not assume its chair count creates that many individual ticket records.
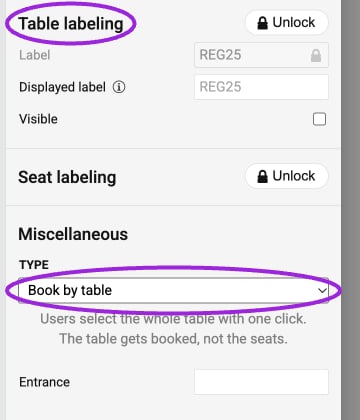
Table labeling identifies the unit; Book by table reserves the whole table instead of its chairs.
Configure the layout
- Open Seat Charts and edit or duplicate the venue chart.
- In the designer, configure the background, tables, booths, floors, or zones needed for your venue.
- Label bookable objects and assign categories. Keep a clear distinction between background decoration and sellable inventory.
- Save and publish the chart. Resolve validation errors before attaching it to an event.
- Follow event assignment to connect ticket categories and prices.
- Preview the map on desktop and mobile. Test each floor or zone and inspect the purchase summary, especially for whole tables.